This post and the photos within it may contain affiliate links. If you purchase something through the link, I may receive a commission at no extra charge to you.
Hey letterfriends!
Lettering layouts and compositions are one of the biggest struggles we continuously see with beginners.
Learning how to manipulate multiple words effectively and with confidence requires a lot of time and practice.
But what if it doesn’t have to be like that?
What if there was a way to streamline the whole process?
Well, today we are reviewing a digital product created specifically to help you with that!
The Grid Builder is a product that will help you layout your quotes, words, or any lettering quickly and efficiently.
Let’s have a quick overview of the things we will talk about –
- What makes a good lettering layout?
- What is the Grid Builder?
- How to use it? – both digitally & analog methods
- Pros & Cons
- Final overview & where to get it
Let’s get crackin’!
What makes a good lettering layout?
There are several different things that you need to keep in mind when working with lettering layouts, like –
- Balance
- Contrast
- Symmetry
- Hierarchy
- Legibility
- Rhythm
- Etc.
With time and practice, you naturally become more aware of these things.
The more you will practice the more you will develop your ”typographic eye”.
This will help you distinguish well executed letterforms and compositions from the not-so-good ones.
A good starting point is simply being aware of these elements.
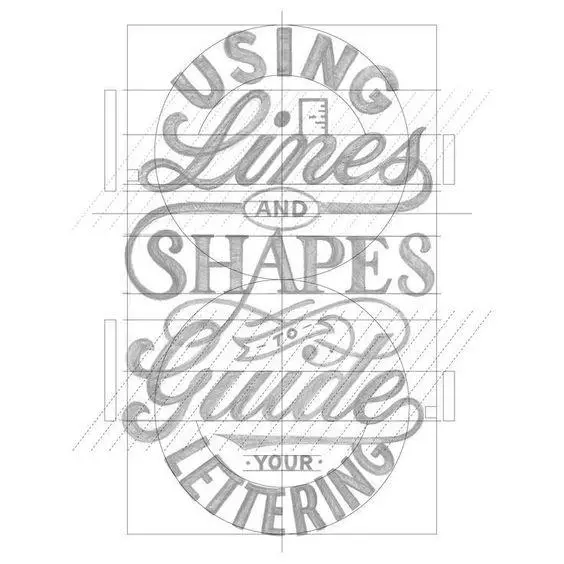
This is a an amazing example of a well designed lettering layout that includes the above mentioned elements – created by @piesbrand.
Stephen has also some great resources on his blog about hand lettering – highly recommend checking them out!
So, how can you improve your lettering layouts?
I hate to sound like a broken record but,
Practice is the only thing that will genuinely make a difference.
However,
And I really can’t stress this enough –
The way you practice is even more important!
Just think about it, if you don’t know where it is that you are making a mistake –
How can you avoid it?
This is exactly why it’s essential to understand basic concepts such as – balance, rhythm, consistency, etc.
I know that all this may sound overwhelming,
But luckily there is a tool that can help you with your layouts and make the whole process much more straightforward –
Especially for beginners!
So, what is this awesome tool? – you might ask
Ladies and gents, I’m excited to introduce you to –
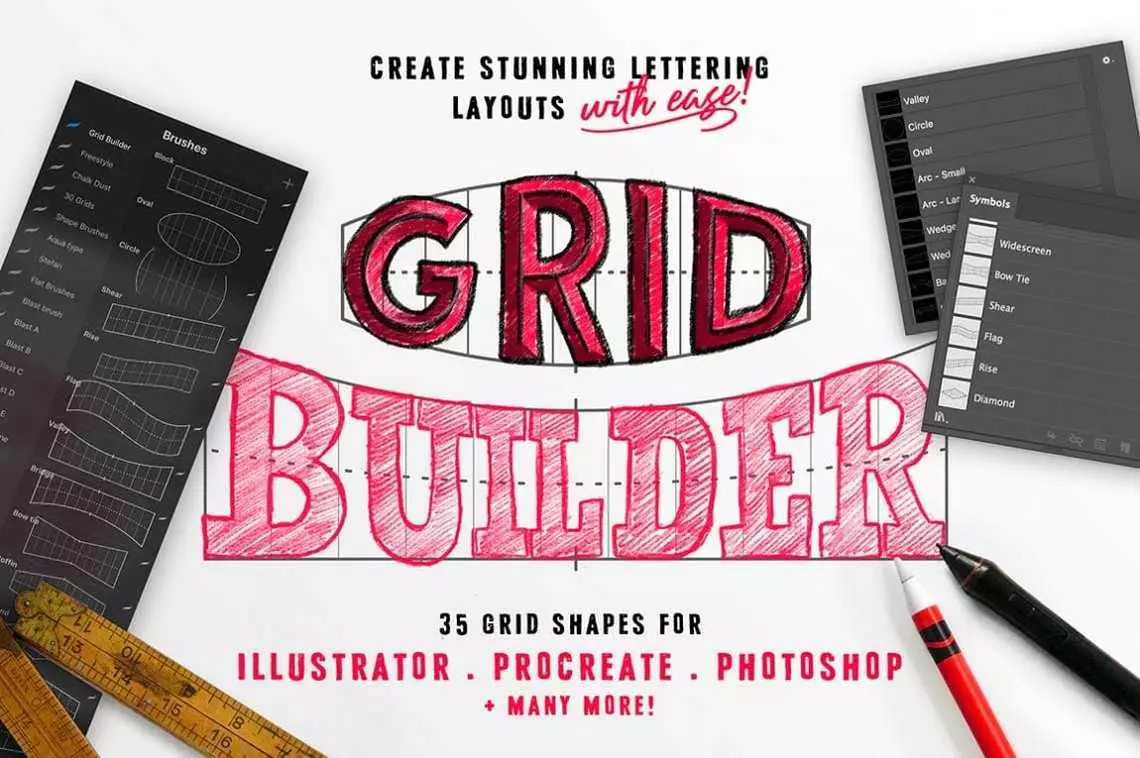
The Grid Builder – Layout Composer
The Grid Builder is a digital tool created by two talented and hardworking lettering artists.
If you’ve been part of the online lettering community (especially on Instagram), you are probably already familiar with the stunning works of Ian Barnard and Stefan Kunz.
As mentioned earlier,
Creating lettering layouts effectively is no easy task –
especially when you are just getting started.
You have a quote or multiple words that you want to letter,
You already have a style in mind, but you are not sure how to lay it out without making it look like it’s just thrown on the page.
Well, this exact idea is what created this excellent tool!

So, what exactly is the Grid Builder?
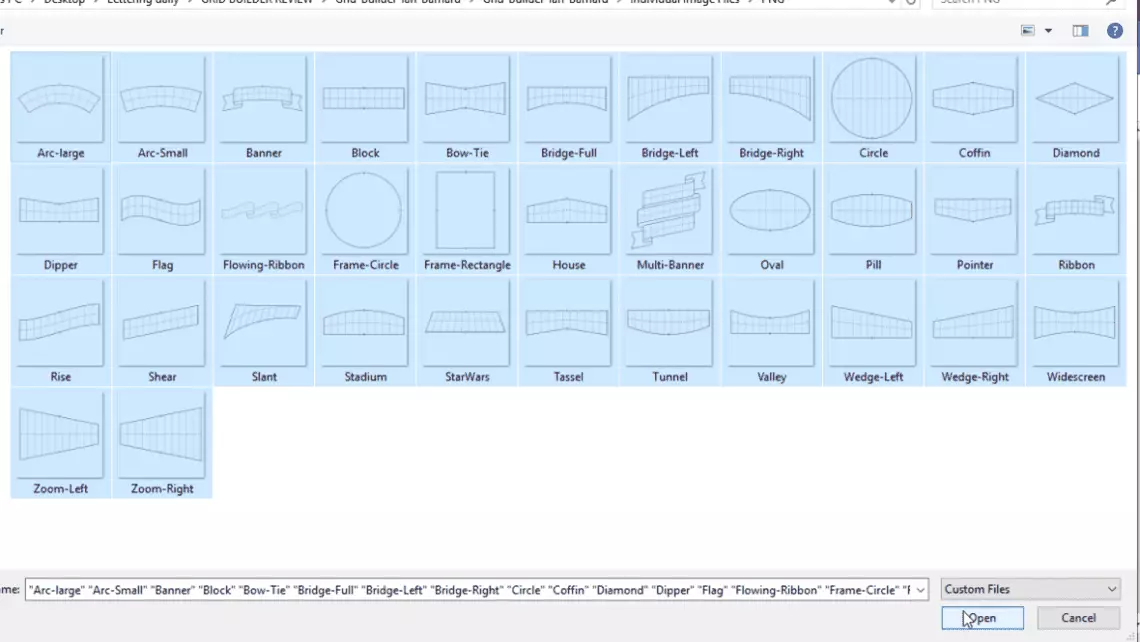
It’s a set of 35 individual pre-made grids (shapes) that you can put together and use as a layout for your lettering.
The best part is,
That it works both for digital and analog lettering!
All of the individual shapes are fully adjustable, and you can use them on a whole bunch of different software –
- Procreate
- Adobe Illustrator
- Adobe Photoshop
- Adobe Sketch
- Affinity Designer
- Autodesk
- Sketch App
- Grind builder font –
- OTF & TTF
- Individual images

Don’t worry,
Even if you are not tech savvy, you can still use the Grid Builder with minimum hustle –
And I’ll show you how to do that later in this article.
That been said,
The Grid Builder is easy to use, it will save you a ton of time and simply make the whole experience much smoother and more enjoyable.
Let’s have a look at how you can actually use the Grid Builder.
How to use the Grid Builder
Like mentioned previously,
You can use the Grid builder for both digital and analog lettering –
And I’m going to show you both ways.
Let’s start with digital lettering on the Procreate app.
Once you get the Grid Builder, you will also receive an instruction manual that will show you how to install the Grid Builder in Procreate – as individual brushes.
Ok, now that you have the Grid Builder installed within Procreate as separate brushes,
It’s time to roll up your sleeves and get to work!
In this article, we already talked about how to create a lettering layout from scratch.
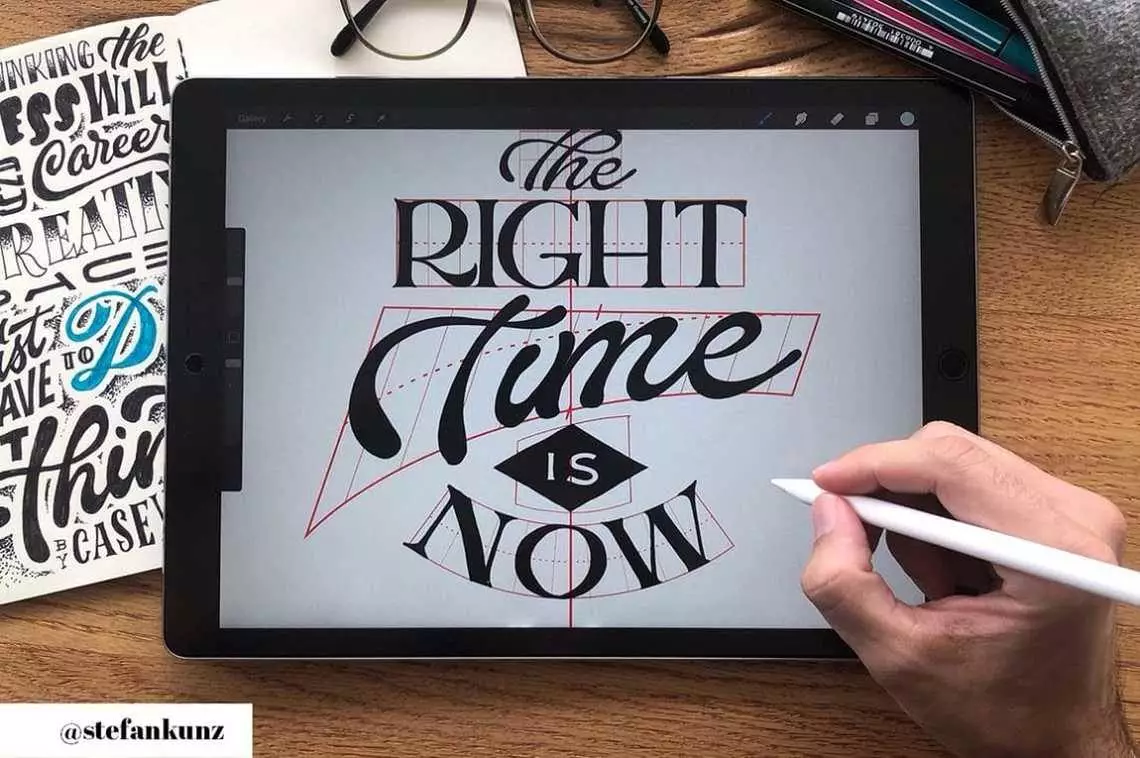
I’m going to show you an example using the same method while using the Grid Builder.
Of course, there are different ways of creating lettering layouts,
This is just my personal method that I think breaks down the process nicely and makes it more beginner friendly.
Step 1
First of all, we need some words, right?
If you can’t think of some words to letter or a good quote, head over to Pinterest.
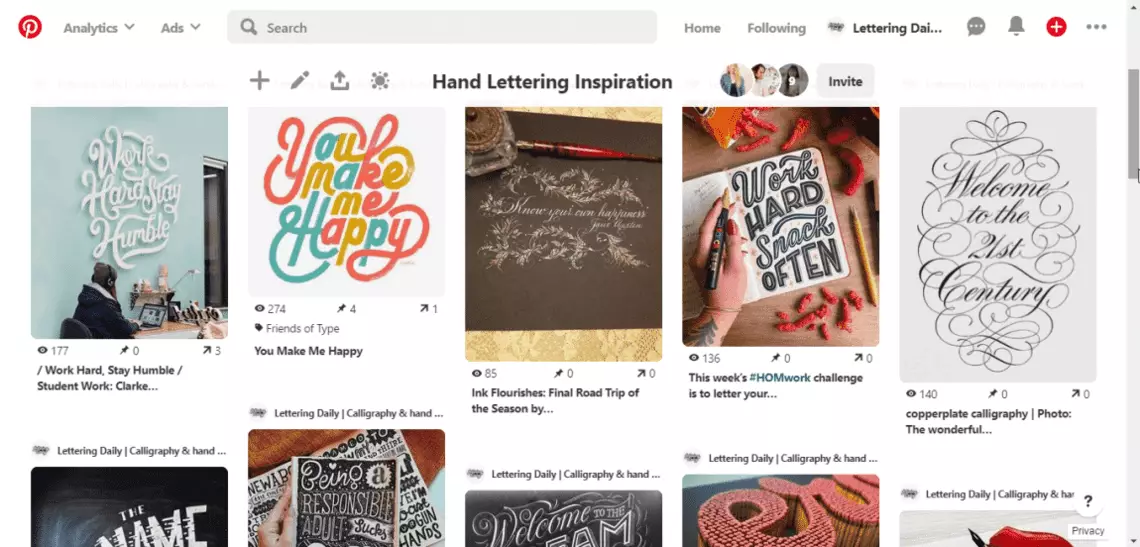
Pinterest is an excellent social media/search engine platform for finding all sort of ideas and inspiration.
I’ve come up with the following quote (cliche warning) –
“It always seems impossible until it’s done.”
Step 2
Grab your iPad, open up Procreate, and with your regular handwriting, write down the words.

Step 3
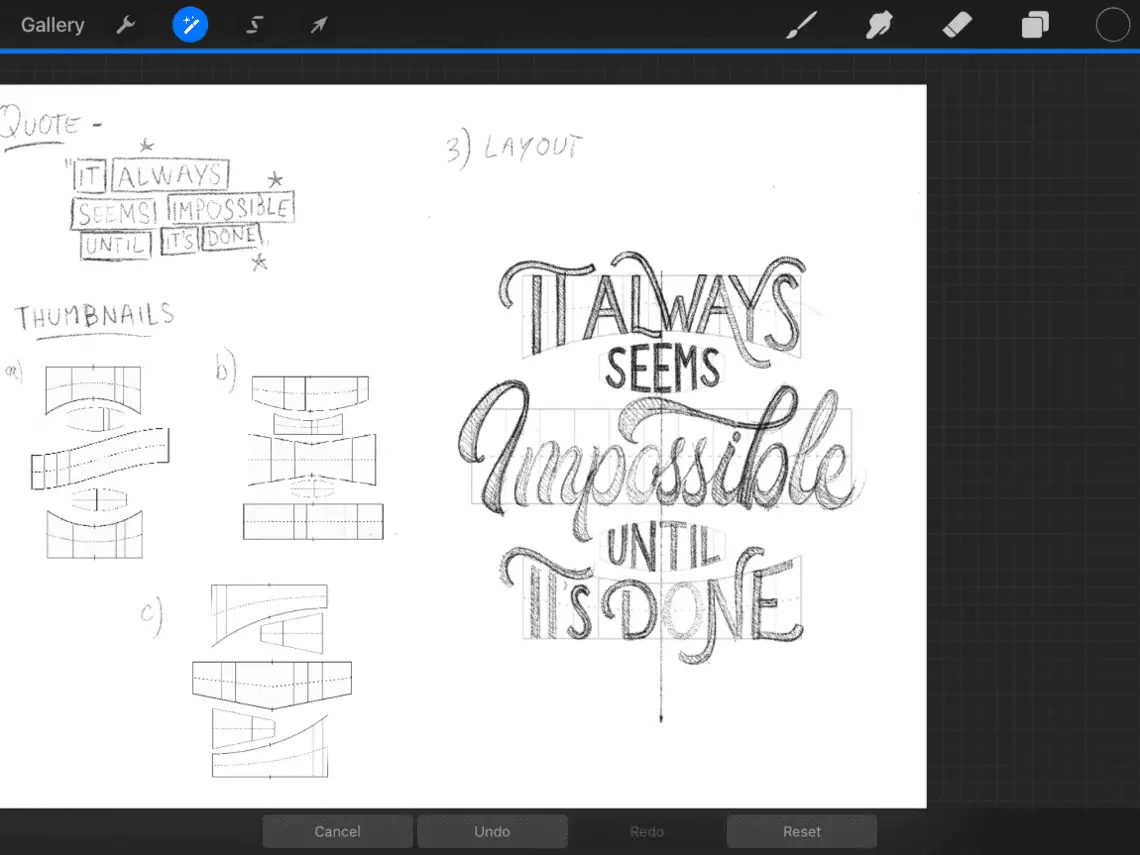
Next, we are going to box the words so we can better focus on the layout itself.

Before we proceed, it’s crucial to determine the style and hierarchy of the piece.
You want to avoid having too many styles and rather keep things simple.
As for the hierarchy –
We want to emphasize certain words over others,
Therefore we make them more significant and more prominent, so they stand out.
I marked the more important words with a small star (you can see them in the next image).
Step 4
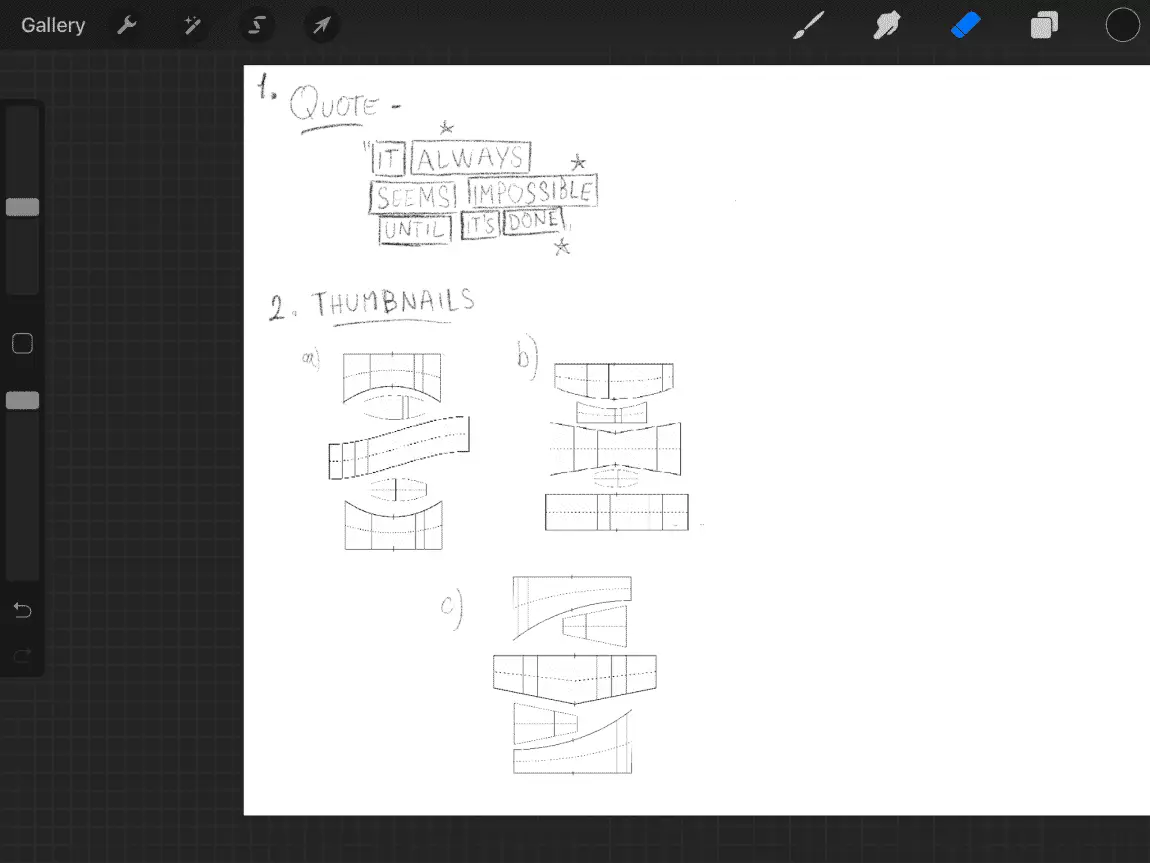
Thumbnail sketches!
This step is often overlooked with beginners, yet it’s super important!
Using the Grid Builder, it’s even faster and easier.
Thumbnail sketches are essential because they allow you to layout different ideas that initially you might not have thought about before.
You can do as many thumbnail sketches as you want,
But I would recommend creating at least 3 of them
Step 5
Once you’ve done the thumbnails and you’ve selected the layout you like the most,
It’s time to build it!
Open up a new layer.
Draw a straight line (by holding your finger down you can lock the line on a straight angle).
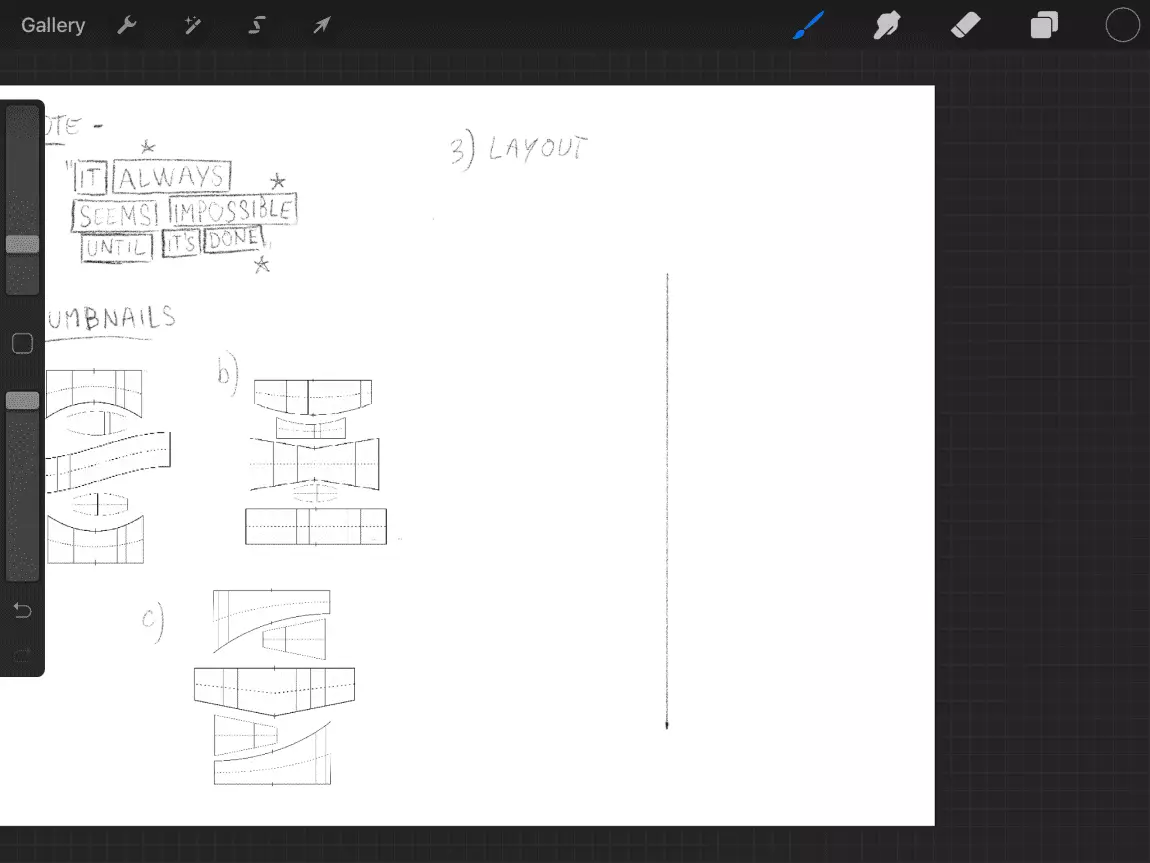
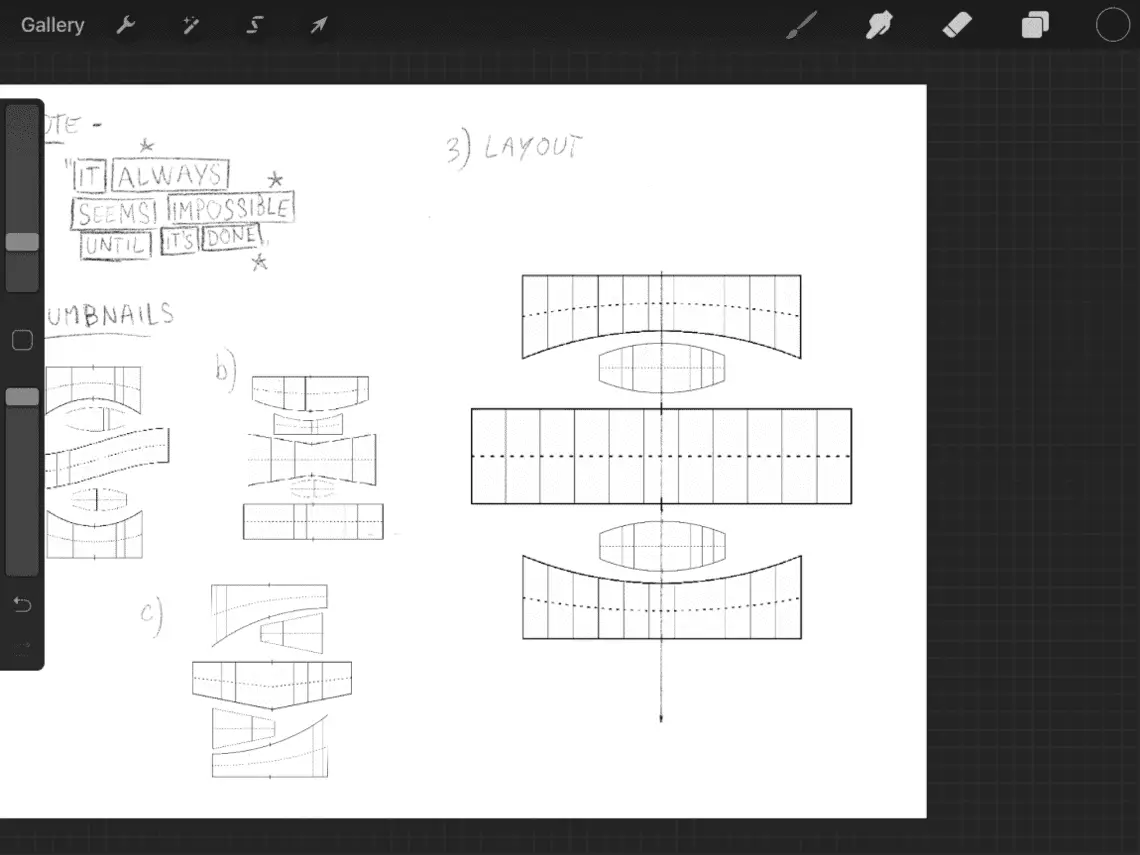
Find the shapes from the Grid Builder library and start laying them out –
Make sure that they are centered using the previously drawn straight line.
Adjust the sizing of the shapes as needed.
Note – With Procreate, you can easily bend the shapes into different ones and create your custom shapes.
Step 6
Lower the opacity of the grid layer – to about 20%.
This way, you can still use the Grid Builder shapes, but they don’t interfere with your sketch.
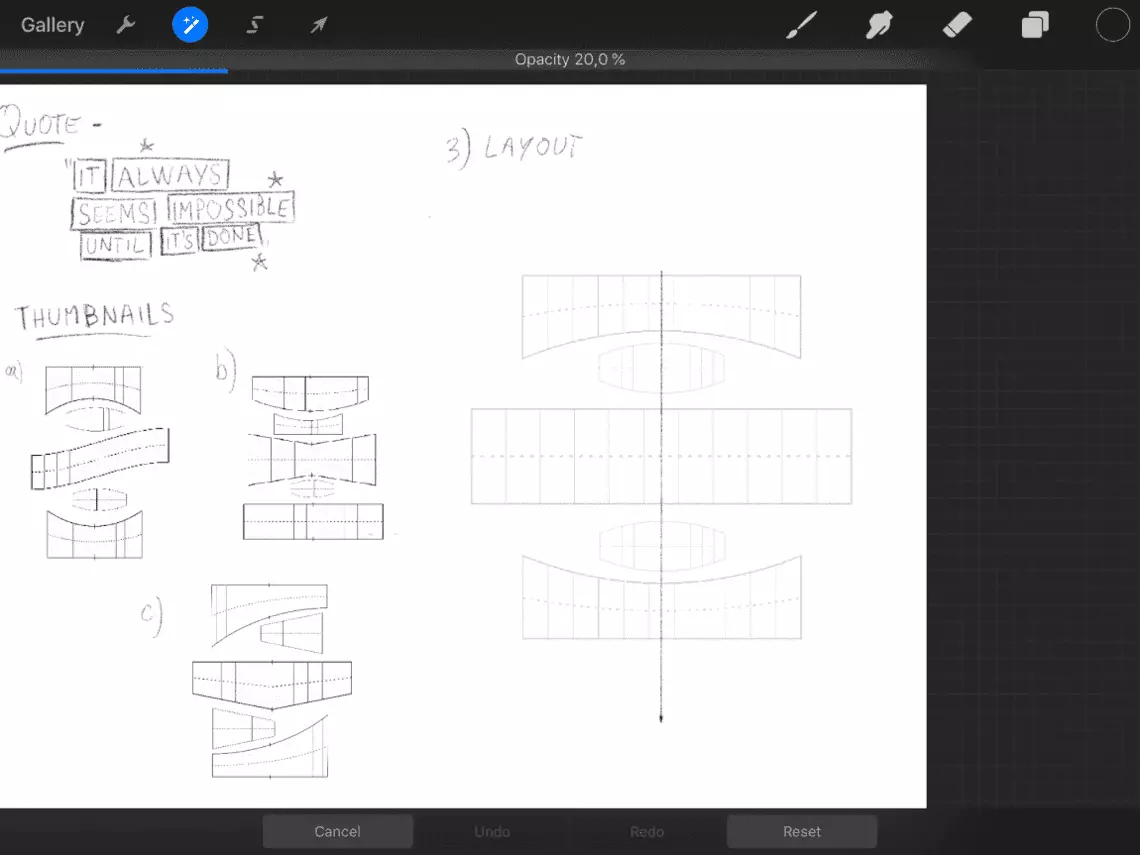
Open up a new layer on top of the grid builder and start sketching your words.
Note – Take advantage of working with layers when you use digital tools such as Procreate. It can be beneficial, especially when working with layouts and multiple elements.
Step 7
Ink your sketch, add some details aaaand,
Voila!
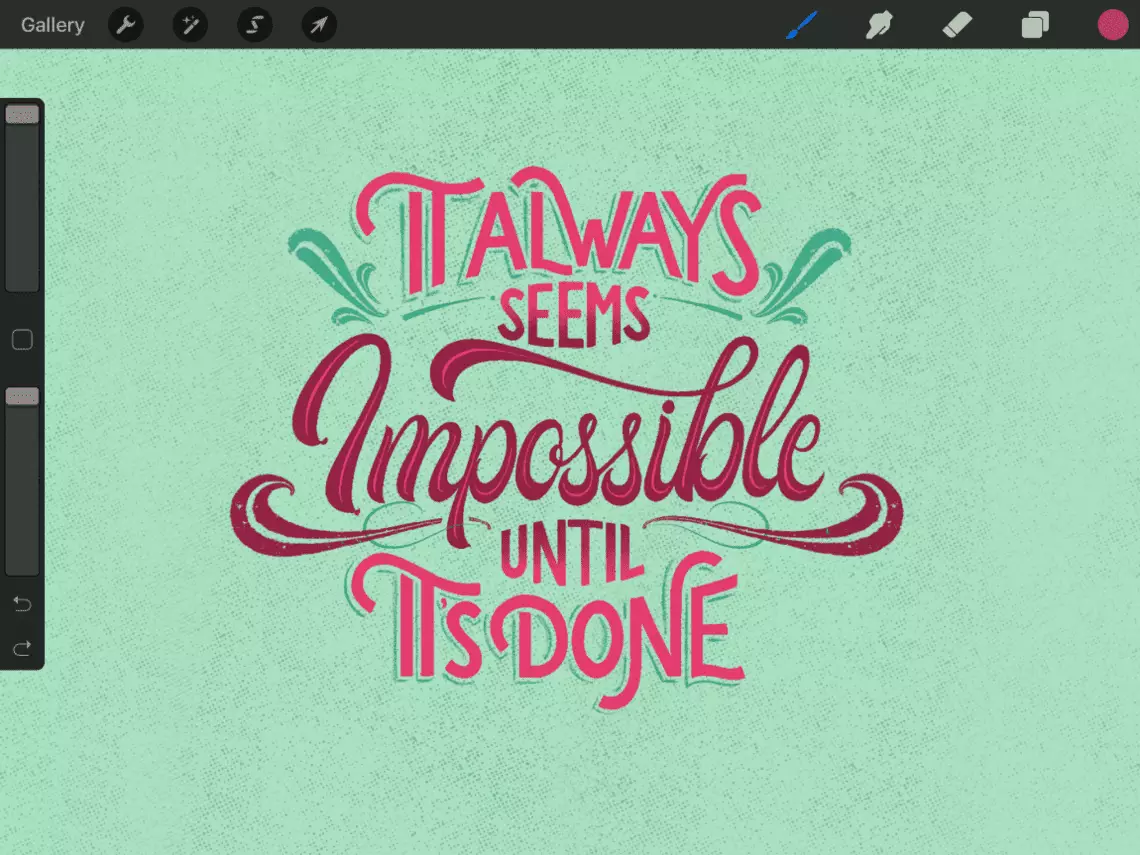
Using the same method, you can use the Grid Builder on other digital apps and software as well.
How to use the Grid Builder with analog tools
For this part, let’s assume that you don’t have the iPad Pro, you don’t know how to use any of those programs, and quite frankly you don’t feel like learning how to use any of them –
Just so you could use the Grid Builder.
Fear not,
you can use the Grid Builder even if you are not tech savvy or you don’t have any experience with digital design software such as Illustrator or Photoshop.
But you will need a printer though.
For this tutorial, we are going to use a free (design) website app called Canva.
It’s completely free to use, and it’s very user-friendly.
Let’s get started

Step 1
Head over to Canva.com and create your free account.
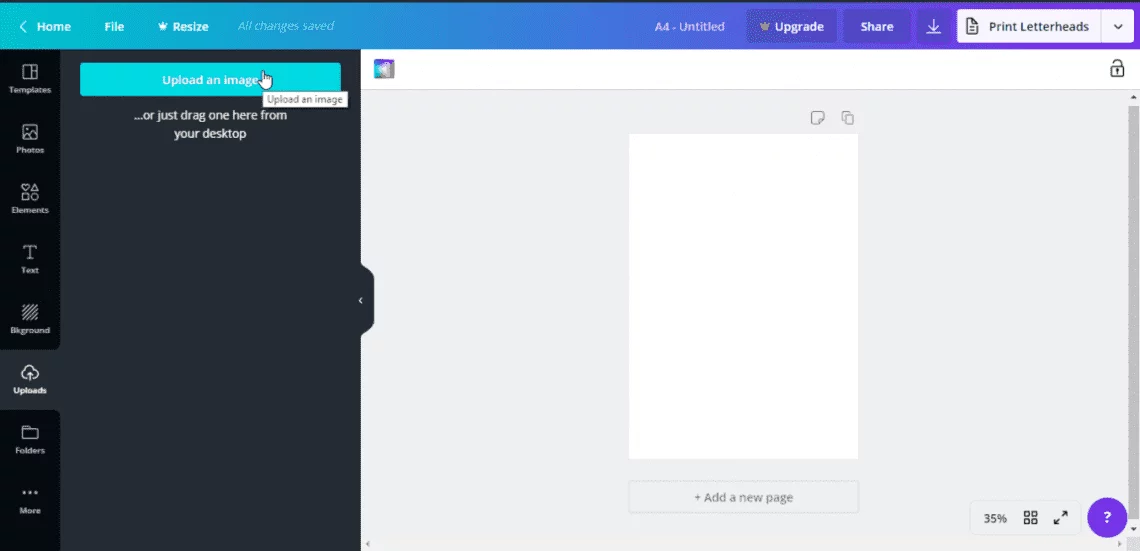
Once you are there open up an A4 document – type in the search bar A4.
A new window will open up with a blank A4 canvas and a control panel on the left side.

Step 2
Click on the “uploads” button and upload all of the Grid Builder shapes – from the individual images folder.
Note – if you have the premium version of Canva you can also upload the grid builder as a font.
Step 3
Great!
Now that you have the whole Grid Builder uploaded on Canva, it’s time to create our layout.
Before you jump right into creating your layout, I would suggest creating a few thumbnails to see which is the best option for your quote or words that you choose.
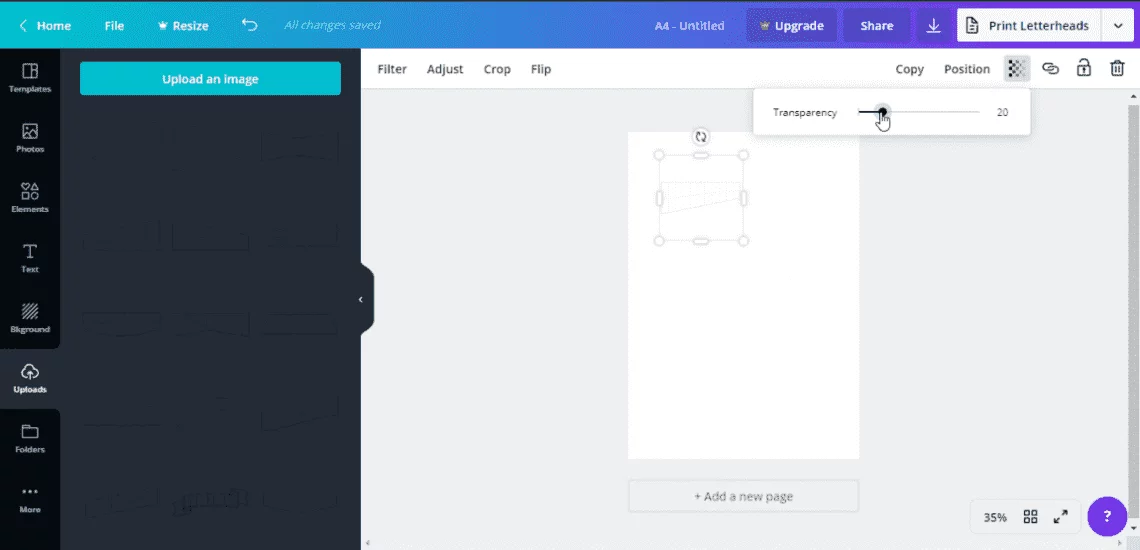
Canva is a drag and drop platform, so to start building your layout, you need to select the individual shapes and drag & drop them to the canvas area.
As you drag each shape, and before you drag a new one – make sure you are lowering the opacity of each one to about 20%
This way, you can still see the Grid Builder when you print it out, but it won’t interfere with your sketching.
Step 4
Layout the rest of the shapes and adjust the sizes as needed.
Unfortunately Canva doesn’t allow you much customization of the individual shapes like with Procreate.
After that,
simply download the file and print it out.

Step 5
You should be having something like this –

Step 6
Using a pencil, sketch out your words.

Step 7
Once you are done, it’s time to transfer the sketch to a new piece of paper – so we can get rid of the grid layout.
If you have a light tablet, slip the sketch paper under a new piece of paper and trace it out.
If you don’t have it, flip the paper on the other side and cover the back with the pencil.
Like this –

Take a new piece of paper, put the backside of the sketch (that is covered with the pencil marks) on top of it, and start tracing your sketch.
I would recommend fixing the papers with some tape to avoid them moving.

Step 8
Once you finished tracing, it’s time to ink the whole thing and add some details.


I know, the analog method is not as simple as the one on Procreate, but I just wanted to show you that you can use the Grid Builder without the iPad Pro.
Pros & Cons of the Grid Builder
Ok, now that we’ve seen the Grid Builder in action it’s time to review the pros and cons.
Although it might already be pretty obvious, I’m just going to go out and say it –
This tool is freaking awesome!
And I recommend it to anyone who wants to create lettering layouts.
That been said, let’s start with the pros.
PROS
- Easy to use – beginner friendly
- Makes the whole process faster
- You can use it on so many different software and apps
- Both digital and analog usage
- A high quality/price ratio
- You can create tens of thousands of different layouts – literally
CONS
- The analog method is not as smooth as the digital one
Although you can use it for both digital and analog lettering, i believe that it’s much easier to use it with digital tools.
Aside from this, i really cannot think about any other negative aspects of the Grid Builder.
I would rate the Grid Builder with a 9.5 out of 10
Stay updated with my tutorials and get instant access to the Lettering Crate –
A growing library of free lettering & calligraphy resources that includes –
Pin me!
About the author

Hey, I’m Max Juric, and I’m deeply passionate about calligraphy and hand lettering.
I’ve spent years honing my skills in the art of lettering, working with hundreds of clients from all over the world on design projects such as logotypes, branding, custom lettering, murals, and more.
But my journey doesn’t end there. I’ve also dedicated myself to sharing my knowledge and expertise with others, creating a wealth of resources including tutorials, articles, and podcasts.
It’s been incredibly rewarding to see thousands of people engaging with my content each month. Knowing that I’m helping fellow enthusiasts grow and develop their skills makes me really happy.
Welcome to Lettering Daily, your hub for all things lettering and calligraphy. Whether you’re a seasoned pro or just starting out, I’m here to inspire and guide you on your lettering journey. Stick around, and let’s explore the world of letters together!


Cliche? An entire nation live be by these words of our former president, Nelson Mandela. Sheesh, research more and judge less (perhaps you live by what Beyoncé and Taylor say?)
Me calling it cliche doesn’t mean i have something against it. I was just making a joke, and besides many things can be positive and cliche at the same time 🙂 Definitely didn’t mean to offend or insult anyone.
Keen to try this out but struggling with Step 2:
‘Click on the “uploads” button and upload all of the Grid Builder shapes – from the individual images folder.’
Where is the ‘individual images’ folder please?
There’s no instruction on how to install. So frustrated.
Ahh sorry to hear that Albert! This is definitely something for the developers to consider in their future updates.
In the meantime, check out this YouTube video from DK – https://www.youtube.com/watch?v=nsyNKk1Jq-8&t=28s
Let me know if this helps if not shoot me an email and I’ll see what else we can do to help! 🙂
Tks for sharing. Even i’m brazilian, i understood your easy way to explain. Really nice!
Hey Mary, thank you for your comment! I really appreciate the kind words, and I am happy this was helpful to you 🙂
Purchased the grid builder. It did not come with any instructions on how to install into Procreate. Having trouble figuring it out.
Are you still struggling with this?
Love it! Thanks for sharing this cool product.
Thank you! <3