This post and the photos within it may contain affiliate links. If you purchase something through the link, I may receive a commission at no extra charge to you.
I’ve been doing brush calligraphy for nearly a decade, and over the years, I’ve had the chance to try out and test many brush pens.
Whether you’re new to calligraphy or an experienced artist, this guide will help you find the right brush pen for your needs.
There are, of course, many other brush pens on the market; this is just a tight selection of my favorite ones.
Without further delay, let’s get to it!
I also made a YouTube video if you prefer to watch –
Make sure to get the “right” type of brush pen
I don’t want to waste your time, but I believe this is important to know so you avoid spending money on the wrong brush pens.
A brush pen is essentially a marker with a pointed, flexible tip that allows you to create strokes of various thicknesses—an essential element for calligraphy.
When buying brush pens, you’ll most commonly come across two different types:
- Felt tip brush pens – A single, cone-shaped sponge tip.
- Bristle hair brush pens – A pointed tip formed by individual brush hairs.
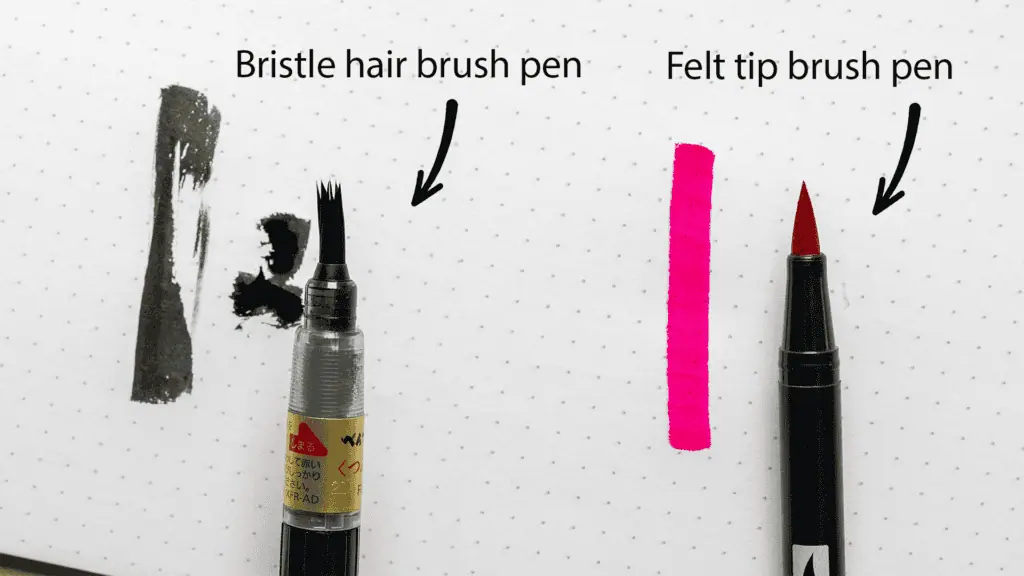
Both are suited for calligraphy, but if you’re just starting out, make sure to get a felt tip brush pen since they are much easier to handle.
This whole list contains only felt tip brush pens. They are very similar to each other, varying in size, nib elasticity, ink flow, and color selection. Whichever you choose, you won’t go wrong, and it will be a great starting point for your brush calligraphy journey.
1. Tombow Dual Brush Pen
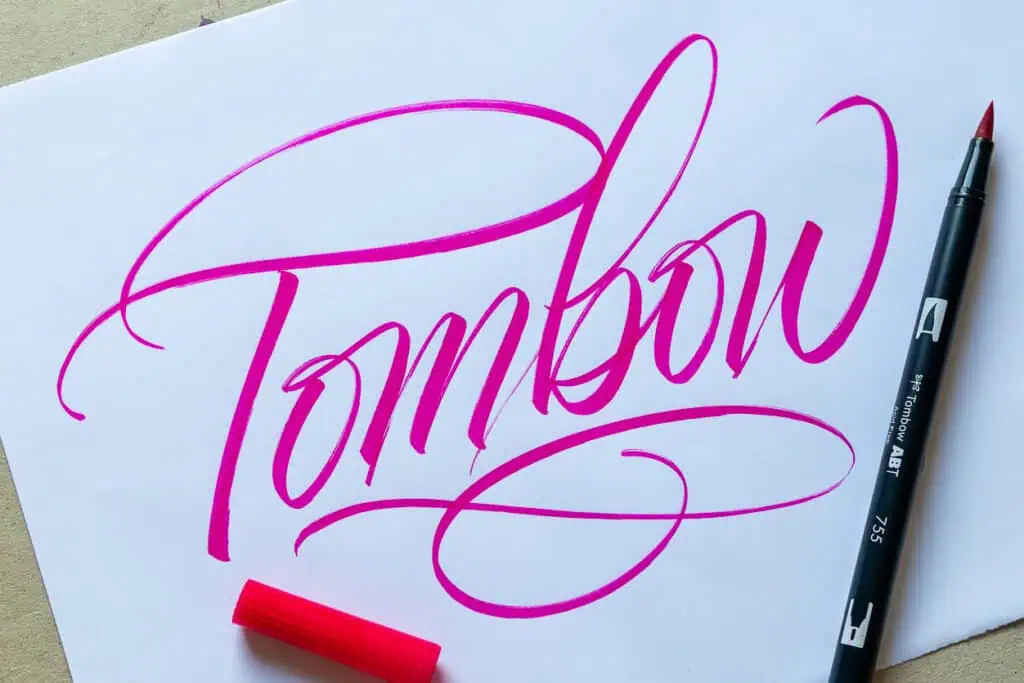
The Tombow Dual Brush Pen is one of my absolute favorite calligraphy tools ever. It was the very first brush pen I worked with, which kickstarted my calligraphy journey nearly a decade ago.
The Tombow Dual Brush Pen offers incredible versatility with its dual-tip design—one side features a soft, flexible brush nib, while the other has a fine tip for detailing. It has one of the best nibs of all brush pens.
Flexible yet snappy, it allows you to create a wide variety of strokes It’s ideal for blending thanks to its water-based ink, and it comes in over 100 colors. This pen’s flexibility makes it great for various calligraphy styles, though the brush tip can wear out on rougher paper.
Features: Versatile with dual tips—brush for bold strokes and a fine tip for details.
Pros: Dual tips, blendable ink, wide color range, flexible and responsive brush tip.
Cons: Ink may bleed on thin paper, and the tip is easily frayed if used on cheap paper.
Best Used For: Larger calligraphy projects, blending techniques, and adding details—great for everyday practice.
Sample video –
2. Tombow Fudenosuke (Hard & Soft Tip)

The Tombow Fudenosuke is perfect for beginners due to its small size and durable nib. It includes both hard and soft tip versions, which offer different writing experiences.
The hard tip is better for more controlled strokes, while the soft tip allows for more flexible, dynamic lines. This pen is ideal for smaller lettering and detailed work, and it handles well on different types of paper without fraying easily.
Features: The Tombow Fudenosuke offers excellent control and flexibility, with hard and soft tip options.
Pros: Great for beginners, precise strokes, durable.
Cons: Limited color selection.
Best Used For: Precision lettering, small projects, and practicing fundamental calligraphy strokes.
Sample video –
3. Pentel Brush Touch Sign Pen

The Pentel Fude Touch features a flexible tip that balances something between hard and soft nibs, providing easy control for beginners while still allowing fluid, expressive strokes.
The tip is durable enough to withstand rougher paper without fraying too quickly. It comes in 12 colors, and the ink is available in both water-based and pigment options (the latter being more fade-resistant).
Features: Known for vibrant colors and a smooth, flexible nib.
Pros: Affordable, vibrant ink options, flexible tip, great writing feel.
Cons: Ink can fade on some papers.
Best Used For: Sketching, small to medium calligraphy projects, and learning the fundamentals of calligraphy.
Sample video –
4. Ecoline Brush Pen
The Ecoline Brush Pen is perfect for bold, expressive lettering thanks to its highly flexible nib and juicy and vibrant ink flow. The liquid watercolor ink is blendable and re-wettable, allowing for beautiful gradient effects.
This pen is also refillable, making it more environmentally friendly. Ecoline has its own line of watercolor inks that are just amazing, and I’ve used them in combination with my other calligraphy tools. Keep in mind that it’s less suitable for fine strokes and requires smoother paper to avoid nib damage.
Features: Watercolor-like, vibrant ink, perfect for bold, artistic designs.
Pros: Bright colors, flexible tip, blendable.
Cons: The sensitive tip requires special paper; it’s not the best for thin upstrokes.
Best Used For: Artistic calligraphy with vibrant colors and watercolor effects.
sample video –
Bonus tip for the Ecoline brush pen – secret tip hack!
One of the most significant downsides of nylon fiber (felt tip) brush nibs is that they tend to start fraying after extensive use or poor maintenance.
There is a really cool hack with the Ecoline brush pen in case your nib begins to fray!
Check out the video below for how to do it!
5. Sakura Koi Brush Pen

The Sakura Koi Brush Pen features a mid-firm, elastic nib that provides great control over both thick and thin strokes. It has water-based ink that’s easily blendable, allowing smooth transitions between colors.
One thing that makes the Sakura Koi stand out from the crowd is its durability, as it holds up well over time even with frequent use.
Features: Smooth ink flow and solid color variety—ideal for daily practice and creative calligraphy.
Pros: Portable, flexible tip, smooth ink, durable.
Cons: Limited color range; tips fray easily on cheap paper.
Best Used For: Blending, portable art projects, and practicing different styles.
Sample video –
6. Karin Brushmarker PRO
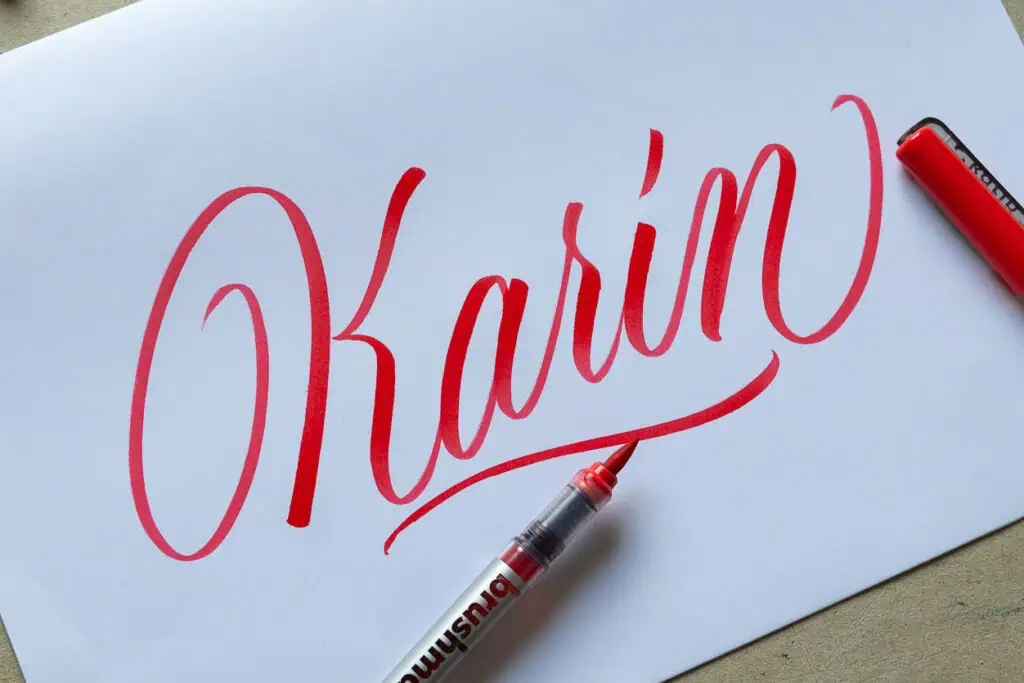
The Karin Brushmarker PRO offers highly pigmented ink and a responsive nylon tip, making it ideal for vibrant lettering and gradient effects.
The pen’s liquid ink technology ensures consistent color until the very last drop, and the ink is blendable with other colors. Thicker paper, such as watercolor paper, is also suited for this brush pen to handle the heavier ink flow.
Features: Blendable, vibrant ink with a flexible nylon tip for various calligraphy styles.
Pros: Excellent color blending, durable nib, wide color selection.
Cons: Pricier than other options.
Best Used For: Gradient effects, vibrant illustrations, and detailed projects.
Sample video –
7. Zig Kuretake Brushables

The Zig Kuretake Brushables is unique because it offers dual-color tips in one pen, perfect for creating gradient effects or working with complementary colors.
The nib is comparable in size to Tombow’s, offering mid-firm elasticity for smoother transitions between strokes. However, the higher price point and limited color availability make it less accessible.
Features: Unique dual-color brushes in one pen, offering versatility in color gradients.
Pros: Dual colors, long-lasting nib, great for gradients.
Cons: Limited color range outside Japan, higher price, needs high-quality paper.
Best Used For: Dual-color designs, shading, and special calligraphy projects.
Sample video –
8. Lyra Brush Pen
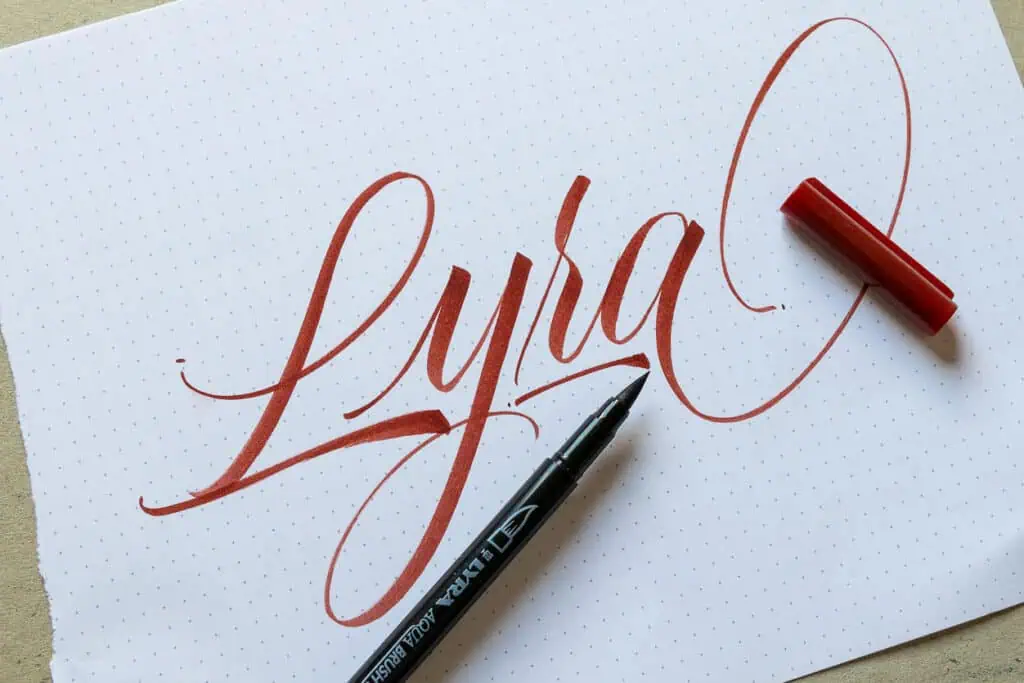
The Lyra Brush Pen features a felt brush tip with smooth ink flow, along with a smaller firm tip on the other end for versatility.
Although its color selection is more limited compared to other brands, it’s still a solid option for those looking for dual-tip functionality. The nib performs well on smooth paper but may wear down on rougher surfaces.
Features: Dual tip, a solid mid-size nib, water-based ink.
Pros: Smooth ink flow, dual tips, snappy brush tip.
Cons: Limited color range, nib frays on cheap paper.
Best Used For: Beginner practice and small calligraphy projects.
Sample video –
9. Sakura Pigma Professional Brush Pen
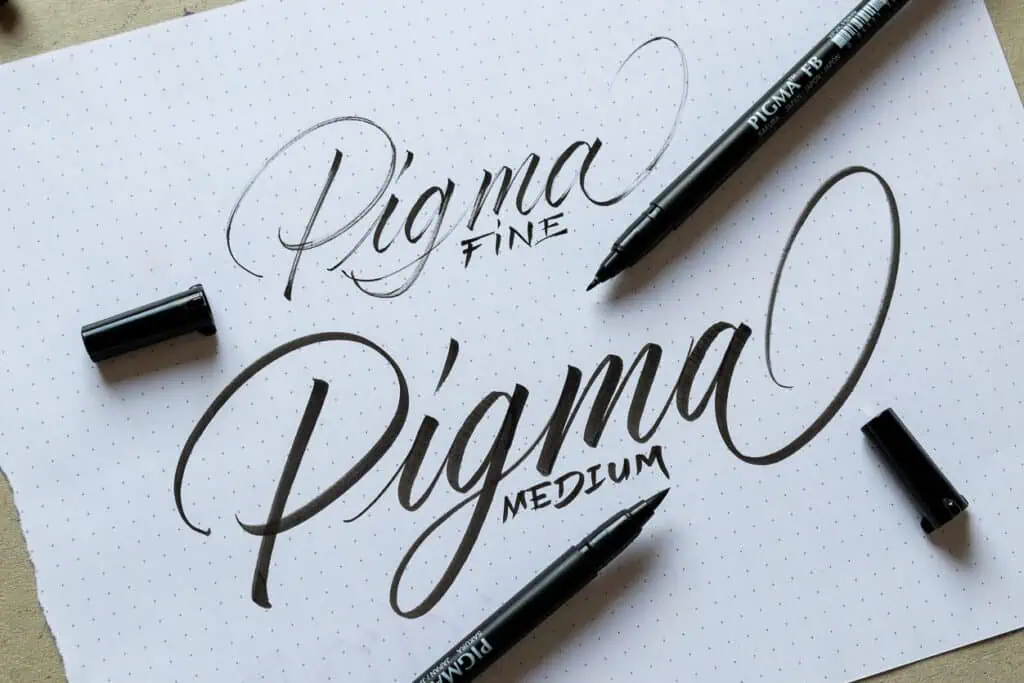
The Sakura Pigma Professional Brush Pen is known for its archival-quality ink, which is fade-resistant, waterproof, and quick-drying. This pen is a go-to for professional projects requiring longevity.
The set comes with three nib sizes—fine, medium, and bold—giving you a range of options for detailed and bold work.
Features: Known for archival-quality ink and excellent control for professional work.
Pros: Fade-resistant, waterproof, long-lasting, rich and dense black color.
Cons: Limited colors, soft brush tip takes getting used to.
Best Used For: Professional work, archival projects, and high-detail illustrations.
Sample video –
10. Crayola Marker (Not a Brush Pen, Still Great for Calligraphy)

Though not technically a brush pen, the Crayola Marker can still mimic brush calligraphy strokes. Its firm, cone-shaped nib allows you to vary pressure and create different stroke widths. I made a separate tutorial on how to do calligraphy with Crayola markers, where I explain how to hold the marker, create strokes of different thicknesses, and included free worksheets in the Lettering Crate.
These markers are highly durable, affordable, and widely available, making them an excellent option for beginners who want to practice basic strokes before investing in more specialized tools. I’ve been using Crayola markers for years, and they’re still one of my favorite “brush pens.”
Features: Cone-shaped tip, a wide range of colors.
Pros: Super cheap, widely available, durable.
Cons: Not a true brush pen, limited flexibility.
Best Used For: Great for daily practice, experimenting with different styles, daily practice, fast and expressive strokes.
Sample video –
Avoid These Cheap Brush Pen Sets
If you search on Amazon for brush pens, you’ll find tons of cheap sets that all look pretty much the same, only with different names/logos slapped on them.
They usually offer 30+ brush pens for less than $10. Trust me when I say these are not good for brush calligraphy—you’ll just be wasting your money.
Best and Cheapest Option for Beginners
It’s much better to get a smaller pack of good-quality brush pens. You’ll spend more or less the same amount of money (less than $10), but you’ll at least get a good-quality brush pen.
If I had to recommend the best and cheapest option for beginners, it would be the Tombow Fudenosuke (small set). It includes two pens—one with a hard tip and one with a soft tip. These two pens are a fantastic starting point for your brush calligraphy journey.
Ready to Get Started with Brush Calligraphy?
Now that you know which brush pens are best for calligraphy, here are some resources to help you dive right in:
FAQ about brush pens
Wrapping it Up
There you have it, friends! Whichever pen you pick from this list, you won’t go wrong. Just remember to get a felt tip brush pen over a bristle hair one, and avoid those cheap sets from Amazon that I previously mentioned.
Start with one good brush pen, and as you continue your journey, you’ll eventually get to try other pens and find your favorite.
Pin me!

Stay updated with my tutorials and get instant access to the Lettering Crate –
A growing library of free lettering & calligraphy resources that includes –
About the author

Hey, I’m Max Juric, and I’m deeply passionate about calligraphy and hand lettering.
I’ve spent years honing my skills in the art of lettering, working with hundreds of clients from all over the world on design projects such as logotypes, branding, custom lettering, murals, and more.
But my journey doesn’t end there. I’ve also dedicated myself to sharing my knowledge and expertise with others, creating a wealth of resources including tutorials, articles, and podcasts.
It’s been incredibly rewarding to see thousands of people engaging with my content each month. Knowing that I’m helping fellow enthusiasts grow and develop their skills makes me really happy.
Welcome to Lettering Daily, your hub for all things lettering and calligraphy. Whether you’re a seasoned pro or just starting out, I’m here to inspire and guide you on your lettering journey. Stick around, and let’s explore the world of letters together!

This was an awesome and helpful review! I’ve been tasked with making things for my sisters wedding which requires a lot of this type of writing. I’m 100% new to this and had no idea what pens to get and this review has been AMAZING. I’m now excited to get started. Thank you so much!
I didn’t realise you answered questions! I do have one – any idea what type of pen would be good on a wooden plaque? Thanks in advance!
Hey Suzie, for wood, I would go with a brush with hair and some acrylic paint. If the plaque will be outdoors under various weather conditions, than perhaps a different type of more suitable paint would be better.
Thank you so much, Suzie! 🙂 I really appreciate your kind words.
For a beginner starting to use watercolour to paint artworks on watercolour paper, what do you think would be the best option?
Something that is not too pricy.
I’m also thinking that the felt tip might be better because strands from the brush get frayed.
It’s actually the other way around. Felt tip brush pens get frayed while bristle brushes do not. At least not that easily. If you want to paint watercolors cheaply just go with any bristle brush, there are a ton of sets on Amazon for a couple of bucks.
Would Leuchterm 1917 journals be suitable for use with brushpens?
I think so but im not 100% sure as I don’t have that much experience with those journals. However, I know that they’re rather small in size so that would be a bigger problem if you used them for practice.
Reaeon marker is also great for hand lettering. I really like these pens since they have a lot of colour and are light enough to use for taking notes and keeping things organized.
Thank you for letting me know. I haven’t tried those yet.
do you know about japanese grid paper such as Muji or Kokuyo, do they good for brush pen/marker? I heard they are smooth
Hey Noah, I’ve heard of it but I’ve never tried it out. Keep in mind that many types of papers feel smooth to the touch but the tiny fibers are slowly ruining the gentle tips. That’s why marker pads are the safest choice.
I love the ink that ecoline pens have and I am working on getting more comfortable with them! The colors are so vibrant and beautiful! There are a couple of things I wish were different…the pens are awkward to hold because they are very big around.
Yeah, I know exactly what you mean. They are super fun to work with, but at the same time, they aren’t really suitable for all types of brush calligraphy. This is exactly the awesome thing about having different sizes and characteristics. We can then combine the usage depending on our needs. I think it would be really cool to see a smaller sized ecoline. Imagine combining the small-sized precision of the fudenosuke with a nice juicy flow of the Ecoline. That pen would just fly! 😀
Marker paper tends to be really thin right? So what if I wanted to do lettering for a card so would need a stiffer, thicker paper? What kind of paper is best for brush pens to keep them from fraying?
Hey Alison. If you want to work with thicker I’m afraid that fraying will be inevitable. Of course, they won’t fray immediately, and you can definitely slow down this process by trying to find the smoothes thick paper possible. Look for hot press paper rather than cold press. Also, try to be gentle and go slow. If done properly, you can also use brush pens on that kind of paper for a really long time.
Marker paper tends to be really thin right? So what if I wanted to do lettering for a card so would need a stiffer, thicker paper? What kind of paper is best for brush pens then?
GREAT article Max, thanks!!! Such detail & information about types of brush pen! I understand there’s a certain point you can’t include every pen in your list, but I agree with Kristi on the Kuretake Fudebiyori. Great pen at a fantastic price point – very affordable , excellent quality. Perfect size for smaller bullet journals (5½” x 8½”) too! I especially love your video on each pen, soooo helpful!??? I love the way you do your upstrokes & have been practicing mimicking that – seeing improvement immediately. I have the koi pens on my list to try next, am not familiar with those & greatly appreciate the introduction. Since using old timey metal nibs for 20 years befofe brush pens bscame a thing, I tend to prefer the firmer tips, so providing that information on each pen is awesome. Off topic I guess, but do you know what the pen names mean, if anything? I.E. “Fudebiyori” – fude/ fudenosuki appears to mean a small tip brush??? What does the “biyori,” part mean? Or are these just brand given names – drives me nuts ?Thanks again for a fantastic, useful & well thought out article! I will be & already am, referencing often.
WOW! What a wonderful comment! Thank you so much Jan, It really means a lot to hear that you liked this article. As for your question, I am not 100% sure. I know that the word ”Fude” means brush in Japanese, but I’m not sure what the other part means 😀 I’ll reach out to the company to ask them and then ill let you know! 😀
Hi
I’m interested to know the reason why none of the Copic brush markers feature on this list?
Interested in buying one soon, thank you
Hey there, thanks for your comment. I didn’t include the Copic brush markers for a number of reasons. First of all, they are crazy expensive, they have alcohol-based ink and the tip is simply not suited for brush calligraphy. I’ve heard many good things about them from illustrators but never from calligraphers. It’s been many years since I’ve worked with them so maybe something has changed, but nonetheless I believe that there are far better choices out there. I hope this explains it! 🙂
In a world where it seems we have a million pens to choose from, I appreciated this article and the in-depth look at these particular brush pens. Thanks for your excellent work.
Thank you, Janine! I took me quite a while to prepare everything and I’m really happy to hear that you found it useful 🙂
Hi Max, an excellent article. Interestingly here in Australia we get the Pental Sign pen with a brush tip and it sells for the price as the normal sign pen. Just have to make sure you buy the glittery plastic ones. I was wondering if you had tried the Pilot Petit 3 Fude Pen. I find it very similar to the Pental Sign Brush pen with the advantage of being able to buy refills. I suppose the only thing is it is short and you need to put the lid on the other end to give it balance. It could be awkward for larger hands. Thanks for all your great articles
Hey Rachel, thank you for the kind words! I haven’t tried the Pilot Petit 3, but I will definitely now! I love pens that can be refilled and used over and over again. Also, putting the lid on the other end is a great tip! Thank you for that 🙂
Hi Max, thanks so much for your thorough review. I’m a beginner and it’s been really helpful. I see the recommendations of all these brands so often on different forums but can’t really compare. I bought the Tombow Fudenosuke Brush Pen and it’s been fantastic. It took a bit of getting used to but now I find it works well for my skill level. I’m looking forward to trying something with a softer tip to see how I go. Might try the Pentel Fude on the basis of your review.
Hey Victoria, thank you for your feedback! Definitely try it out, the more pens you try the more you will improve your dexterity and your calligraphy skills overall. One of my favorite things about calligraphy, in general, is to play with different and new writing tools. The Pentel Fude is a great pen and I think you will love it, just make sure you get the right one. I mentioned under the pros and cons of the pen in a small paragraph that there is a very similar-looking version of it. However, that one doesn’t have the brush tip, and it has a slightly cheaper price. Let me know if you need any help 🙂
In your opinion, what would be best for use with watercolor on cold pressed watercolor paper?
Hey Dawn, unfortunately, felt tip brush pens won’t last too long on watercolor paper. Especially if it’s cold press – since it has more of a tooth (texture). That been said, the Karin Brushmarker seems to be a candidate that stands out here. It has an extremely wet ink flow and the tip is different than the others on the list. On top of that, the manufacturer recommends using watercolor paper if you plan to blend different colors. So I would recommend those pens, and honestly, I don’t think you will regret it – I just love them! 😀
Thank you for your response and after looking them up they are pretty cool. I am just thinking though, I might need a marker that is not water based as my lettering may be over actual watercolor painting.
Thanks for the response, I looked them up and they look very interesting. I am just wondering though, I may need something waterproof as I would be mostly be doing calligraphic writing or lettering of a quote on a watercolor painting.
No need for that, the important is that it’s not damaging the nib. Watercolor paper is necessary only if you are going to blend different colors, it’s quite difficult to do it on marker paper.
Great article! I would also add Kuretake Fudebiyori brush pen to your list. It’s one of the best brush pens for a beginner. Really easy to control and available in good choice of colours. Also, I personally would never recommend Tombow ABT to a beginner. It’s a great brush pen for an advanced calligrapher but the way too flexible and long tip is really difficult for a beginner to control. I’ve seen students who were completely put off by brush pen lettering just because the only brush pen they tried was Tombow. As soon as I gave them a different pen, they managed to do it beautifully.
Hey Kristi, thank you so much for the comment. I really appreciate it! I love the Fudebiyori brush pens, and I was very close to adding them to the list but I felt they were to close to the Koi brush pen from Sakura. I understand your point of view on the Tombow’s but you have to consider that larger tip brush pens require a different hold as well as a different position of the arm. When you work with larger sized brush pens you must use a different motion, one that is based on whole arm movement. In comparison, working with a smaller brush pen, you rely more on wrist and forearm movements, and you use your finger to add pressure. This is why I wrote at the beginning of the article that I would recommend for beginners to get at least one larger and smaller sized brush pen. This way you can learn how to handle different tools and how to operate with them. Just because something is more challenging, you shouldn’t avoid it. I’ve seen both beginners struggling with it and excelling with larger sized brush pens. One of my first brush pens ever was a larger size and I learned the basics with it. Do you teach? Would love to find out more about it 🙂 Feel free to shoot me an email, would love to connect! Thanks again for stopping by and giving me your feedback – I really appreciate it!
Best,
Max.
Even though I think the consensus is always ‘see what works best for YOU’,.I really enjoyed having another opportunity to convince myself that I need even more brush markers even though I’m firmly into pointed pen, currently. I did also want to add that johnnealbookseller.com offers a brilliant sample pack, which consists of many of the markers you elaborated on (well, not Crayola) , I believe nine different pens, for a cost of about $31. I love the fudenosuke from Tombow because I use it for calligraphy practice occasionally, when it’s inconvenient to travel with a dip pen. I also love to use the ecoine when it’s inconvenient to travel with a pan of watercolor…and sO. Flippin. Juicy! However, I’m more convinced now that I ‘need’.the Karin brush marker pro, and Zig brushables.
Thanks for another great article!
My apologies to anyone reading the other comment I posted; the text appears only as the lightest of grays until I hit ‘submit’, and there doesn’t appear to be a way to make a correction once posted. I’m typically very aware of my punctuation, spelling, grammar etc so this is q teeny bit horrifying for me . Most people will be able to overlook my errors but one that is very important to correct IA the site I mentioned, which should read : johnnealbookseller.com.
Thanks, Max!
Hey Morgen, thank you for the kind comment! I love John Neal’s website, but unfortunately getting things shipped to Europe can be quite difficult and expensive. If you like the Ecoline brush pen, you will just love the Karin Brushmarker! It has a superb ink flow, and the whole writing experience with it is just great. It’s also a fantastic brush pen to create various gradients and colorful artworks. Thank you again for the comment as well as the recommendation 🙂 Cheers!
Thanks so much for sharing the link to John Neal Books Morgen! Love the idea of a samp!e pack & this one is great to try different brands!